(SurvivalDaily.com) – Canning food is an essential part of being a prepper. This is especially true if you live somewhere with seasonal changes. Canning your food is very important in a region that sees harsh winters. You don’t have the ability to grow food year-round, so you need to store it while you can.
What You Need
Having the right tools is the first step to successful canning. There are several types of canning tools. Some of the best, but also potentially the most dangerous are pressure canners. As a bonus though, these canners can also be used for hot water bath canning. You’ll also need containers like jars with lids and rings or seals.
Low-acid foods such as vegetables, poultry, fish, and meats require the use of a pressure canner. They need to be processed at a temperature of at least 240ºF to ensure that all bacteria are killed.
High-acid foods need to be processed with a water-bath canner. Fruits, tomatoes, sauces, and pickles are some examples of these high-acid foods. These only require the water to be at its boiling point of 212ºF.
What to Do
Always make sure your food and tools are clean before starting the canning process. This eliminates cross-contamination, while also preventing bacteria growth. Be sure to wash your hands thoroughly throughout the process for the same effect. Don’t go hog wild at first. It’s not only okay to start small; it’s recommended. Follow safe canning practices such as:
- Cook with quality pots. A saucepan may boil over and cause inadequate coverage of your jars.
- Always use new lids when canning.
- Your water should be at a rolling boil before you start your bath time. (Water Bath method)
- Your processing timer should only be started after you’ve released pressure to reach the desired pressure. (Pressure Canner)
- Use a rack when setting jars, to avoid breaking the jar and to ensure proper water circulation.
- Label and date everything you can. Keep track of everything to ensure a proper shelf life.
Start by following the recipe and processing directions. Heat the jar either in the water-bath or pressure cooker/canner. Put the food in, leaving the correct amount of headspace. Remove any trapped air by using a non-metallic spatula and sliding it between the jar and food. Press the food lightly to remove any air as well; do this repeatedly around the circumference of the jar.
Clean the rim and threads of the jar using a damp cloth. Take your heated lid and center it on the jar, tighten evenly until you feel resistance. No more than fingertip-tight. After processing the food and jars remove them with a jar lifter. Place them onto a rack to cool, never re-tighten or check for a seal while the jars are hot.
After 24 hours check to see if the lids curve downward. This shows that there is a good seal on the jar. Press the center of the lid to make sure there is no flex. Unsealed jars can be re-processed or refrigerated. Remove the bands and wash them with warm soapy water, then dry them off and store them for later. Wipe your jars down with a clean damp cloth and then dry them off. Your jar is ready to be stored!
Storing Your Canned Goods
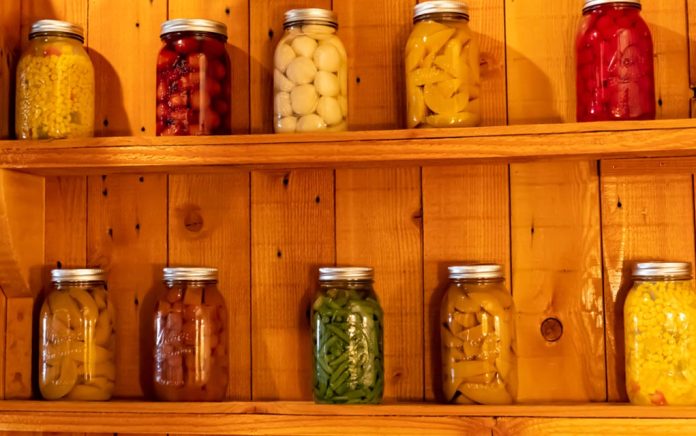
Storing your canned goods is simple. You just need to find a cool, dry, and dark place; basements and cellars are great places to store canned goods. The best, safest method is to store your canned goods in a single layer, rather than stacking them. This way, you can be sure that your jar is sealed from canning, and not just held down by the jar on top of it. Be sure to label and date every jar. Making sure to replace any that are close to expiration. For the best results eat your canned goods within one year of canning. The ability to store food that you grow yourself for a year is tremendously helpful when you’re trying to survive.
Other Things to Consider
When canning there are things to take into consideration. Altitude is a big thing to be concerned about because higher altitudes make for lower boiling points, which will affect your process.
If you have doubts about whether a food is good or not, just throw it away. It’s not worth the risk of getting sick. Foodborne botulism is potentially fatal, and while it’s rare, it is a very real possibility.
Botulism caused by the bacterium Clostridium botulinum can cause paralytic illness. Vision problems such as blurred vision, double vision or drooping eyelids, along with difficulty swallowing, dry mouth, muscle weakness, and slurred speech may be experienced by victims of the bacteria. Left untreated, the illness can cause paralysis in the arms, legs, torso, and muscles that control breathing. Warning signs of Botulism in food are:
- Cans that bulge, leak, or are dented.
- Cracked jars, or jars with loose or bulging lids.
- Food has a bad odor.
- Containers that gush or squirt fluid out when opened.
Thankfully, botulism can be prevented by knowing the warning signs, and good hygienic practices.
Final Thoughts
Canning is a great skill to have, and your life may even depend on it one day. The best part is, you can do it with or without electricity, if need be, and done as a group, it can be a great social project and one by which you can share and trade items. The more survival skills you have, the better off you’ll be if and when SHTF. Just remember to always be safe and follow the process.
~Copyright 2021, SurvivalDaily.com


